My Arcade PC

In short, it's a PC that you can play games on, built in an Arcade style housing with arcade controls instead of a normal desktop.
Another name for these types of PC’s is MAME PC's. MAME stands for 'Multiple Arcade Machine Emulator'. On my Arcade PC you'll be able to play games from a number of different game consoles and platforms. You will be able to choose between classic game consoles like the 'Nintendo', 'Super Nintendo', 'Nintendo 64' or the 'Sega Master System'. Or why not a hand held game console, like the 'Sega Game Gear'? You will also be able play games on old school computers, like the 'Commodore 64' or the 'Amiga'.
And finally you'll be able to play literally thousands of classic Arcade games like 1942, Pac Man or Space Invaders... You'll even be able to play classic Pinball games on it.
At the moment it's all built in a box called SNACK from IKEA.
The plan is to keep perfecting the build until it's ready for its transfer to a "real" arcade housing.
Everything I've built so far has been constructed with the mind set that it must be easy to move to the final Arcade housing. Keep this in mind if you see things that might have been done "easier"...

The finished project should look something like this..
Let's start with the software…
All the games are played on emulators which are hidden behind a really nice front-end called Maximus Arcade. After poking about with what and how the PC should start up I got it to start up Maximus Arcade instead of booting up to a normal Windows environment. In MA you can choose witch game console and game you'd like to play from nice, animated menus.
Maximus Arcade have released version 2.10 after months of beta testing.
In the new version the loading bars are removed during startup. They've also added a delay function for the ingame video function. It's time to upgrade!
Here's the emulators I use in Maximus Arcade...
Arcade: MameUIFX32
Nintendo Entertainment System: VirtuaNES
Super Nintendo: ZSNES
Nintendo 64: Project64
Pinball: Future Pinball
Sega GameGear: Kega Fusion
Sega Master System: FreezeSMS
Mp3 Jukebox: WinCab
I've also been perfecting the bootup of the Arcade PC. I realized that I hadn't set boot order to HDD first and I also turned off the floppy-seek to save time.
I've posted a video of the boot up HERE... (Duration 1:14, aprox 15Mb) This will NOT be the final bootup. I have a great plan for that but I'll leave it like this for now.
The hardest part of this project is all the final little tweaks that take so much time and are so boring to do. But I know that all those tweaks, if done right, make it perfect.
It still sucks though.
NEWS: 13/4-09.
I've set out to create my own startup movie for the Arcade. This is my first try at using Adobe After Effects. See it HERE... (Duration 0:10, Aprox 1,5Mb)
On to the Hardware...
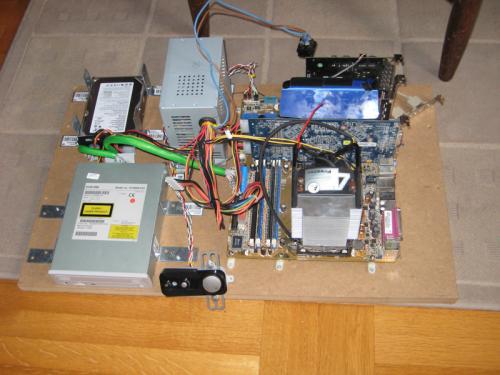
I've built the PC from left over parts that I've gathered over the years. It's running on a 2.2 GHz P4 with 1 GB of RAM and an old 120 GB hard drive. The graphic card's fan was broken and I ended up cutting the 70mm fan out and fastening a 120mm fan on it. A true ghetto-style modification indeed... I'll post some better pictures at the final asembly some time in the future.
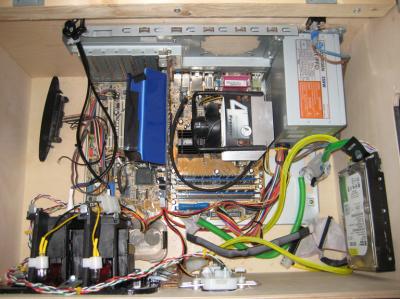
Top view. The modified fan is the big, blue thing in the middle.
The black thing, bottom left, is the coin door with coin mechanics.
I found a company in Norway that sold pinball and arcade parts, called Part4Pinballs.
So I invested in a coin door and coin mechanics for swedish 5 and 10 kronor coins. When you are playing the arcade games, dropping a 5-kronor coin will give you one credit to play with. Dropping a 10-kronor coin will give you two credits. The coin door will also give the arcade machine the right look when the housing is built.
And I have to say that I LOVE the sound it makes when the coins drop.
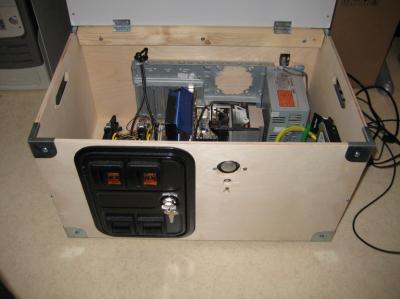
Front view: the coin door, power and reset buttons.
Moving along to the Controls...
Moving about in the menu and controlling the games is easy with the X-Arcade Tankstick controls from X-Gaming. I got my Tankstick from swedish Playtrack.com.
The control set up is two joysticks with eight buttons each. One big track ball in the center and two flipper buttons on each side for the pinball games. The only downside with the Tankstick is that all the buttons are black. Sure, it looks great, but it’s not that practical when you play games and try to give instructions to your fellow gamer.

The Tankstick straight out of the box.
-“Push the button!” –“What button?!” –“The black one, in the middle! Not that one!”…
You get the picture, right?...

The inside of the Tankstick.
So I ended up getting two green, two yellow, two white and two red buttons from Parts4Pinballs so I can replace some of the black ones on my Tankstick.
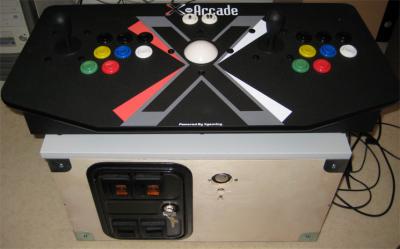
Black buttons replaced.
I'm planing to incorporate the original controlers for the NES and SNES into this build. You don't get the same control over Mario using the Tankstick as you do with the original controllers. Do you remember how your thumb felt like it was on fire, after playing for hours? ;)
I'm thinking about mounting some sort of plate, with two NES and two SNES controller ports in it, on some well hidden place. There I can connect the original controlers and then have the signals converted to USB.
I found a guy in Canada who has made a number of sweet mods and hacks to difrent gaming consoles including the "NES/SNES 2 USB". He also sells the needed circuits on his website. More about this later....(Updated! Build in progress.)
Who's Lucky Luke?...
To add to the feeling of the 1980's I'm using an old 21" Samsung CRT monitor in this build.
It probably weighs 25 kilos so the housing has to be sturdy not to buckle and break apart.
I'm thinking about going with the 25mm MDF board to get the stability and weight it needs to get the right.... feeling... was the word I was looking for I guess....
Going with the CRT made it possible to add lightguns for all the shooting games out there.
I've desided to go with the ACT-Labs guns..
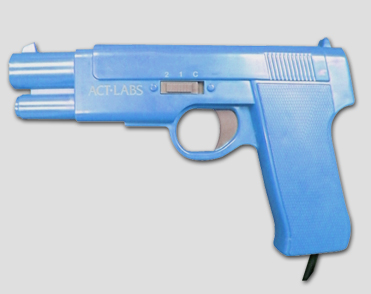
Act-Labs PC & TV USB Light Gun. Also comes in red.
Calibrating the gun was no easy task. It took me a couple of hours to get the hang of it. It started out workinggreat in MAME but if I loaded a game from Maximus Arcade it didn't work at all. After restarting the PC and recalibrating the gun again it now works in MA also. By the way, my right arm is realy sore after just half an hour of blasting aliens.
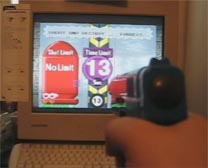
The gun in action.
To see the gun in ACTION click on the image above! (9,59Mb)
Not that good quality but still...
I'll mount the guns (Yeah GUNS! I already know I have to order a second one..) at the sides of the arcade in some type of holsters, like the cowboys used to have.. They'll be easy to access but still out of the way when playing other type games.
Time for some controls of my own..
I'm adding some function buttons, like 'Paus' and 'Menu' to my system. I ended up using a old keyboard and some of the black buttons that I hade left over from the Tankstick button replacement. My first idea was to see if there was any way to add buttons to the tankstik and it's internal encoder. After reopening the tankstik I realized that if there is a way to do it it's beyond my knowledge.
So here's how I did it.
I start by gutting a USB keyboard to get the Keyboard encoder.
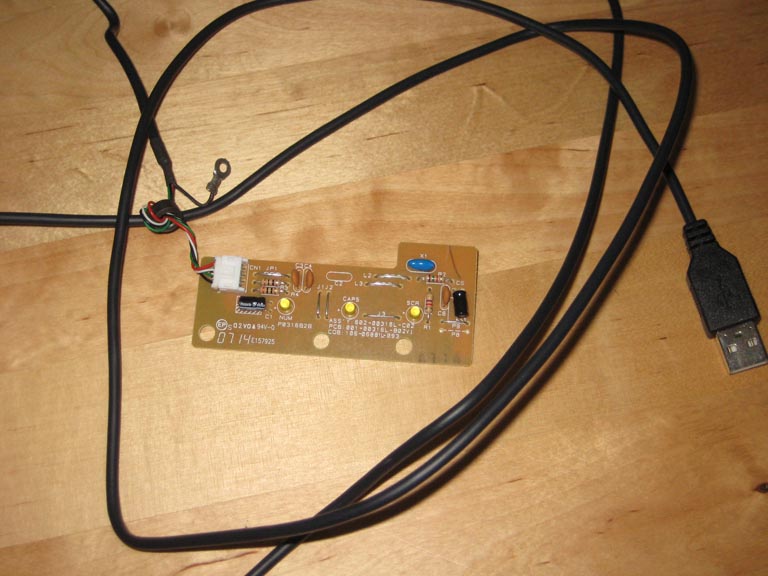
Keyboard encoder from gutted USB keyboard.
The plastic sheets that make out the keys of the keyboard give us some usefull information about the layout of the matrix in the encoder. This gives you a 18 x 8 matrix. With this matrix it is possible to make 18 x 8 = 144 unice keys. More about this later.

The first layer showing 18 and the second layer shows 8 conectors.
I'll solder wires to the contectors on the encoder. To be able to solder anything to it I need to get rid of the black material covering the conectors. I think it might be graphite.
Using a small flatheaded screwdriver it comes off nicely.
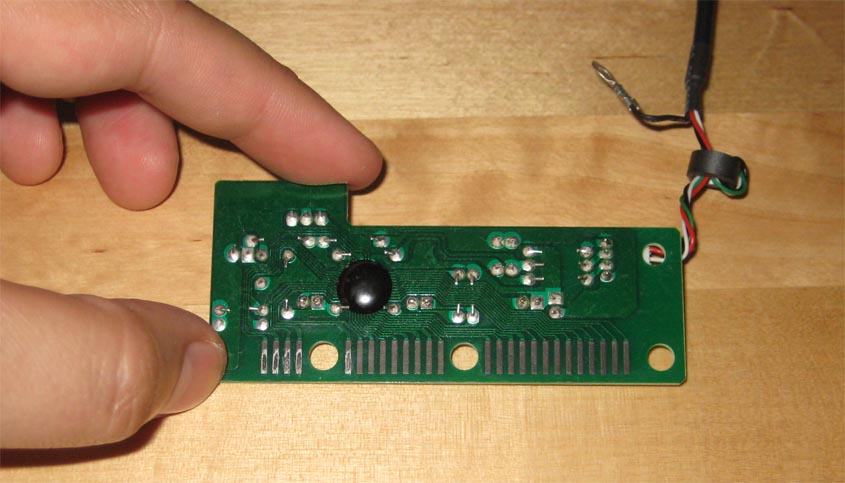
Fist five conectors from the left are cleared.
Before you start soldering the wires into place, make sure you have some solder on the conectors, but not to much, and presolder your wires aswell.

First two wires in place.
All wires soldered. 18 black and 8 red (remember the matrix?).
Now its time to figure out how the matrix is constructed. It's done by connecting black wire B1 to red wires R1 to R8 and writing down what keys are pressed. Then continue with black wire B2 all the way to B18... I made a matrix in excel to help keep notes.

All wires conected.
I'm using Virtua keyboard (Download vKeyboard here. Thanks to Borg2.) to visualize with button is pressed. Notepad works but not for keys like "ALT" and "Insert". That's why Virtua Keyboard comes in handy.

F key is pressed.
This is the keyboard matrix for my keyboard.
Now, if I need to pause a Mame game I have to press the button P.
This is done by connecting a button to wires B9 and R6, and then press it of course.

My matrix. It makes sense to me.. That's all that matters.
I desided to do 3 buttons. P - "Paus", Tab - "Mame Menu" and F2 - "Mame Service button".
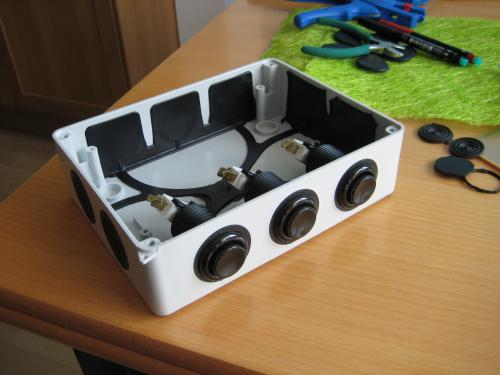
I settled for this plastic box. It will house the encoder and the buttons. When the time comes to build the real arcade housing I will o'course incorporate the buttons to it..
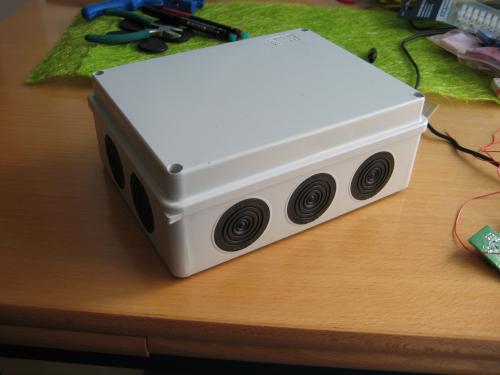
Buttons in place. They where easily installed.
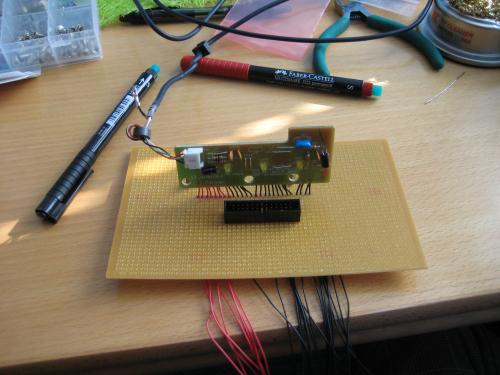
I've soldered the 26-pin conector to the board then fed the wires through the holes.
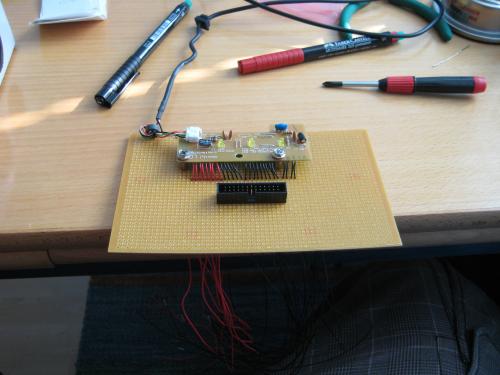
Key encoder fastened with a couple of screws. The encoder is elevated using the same type of brass nuts as you normaly fasten a motherboard to.
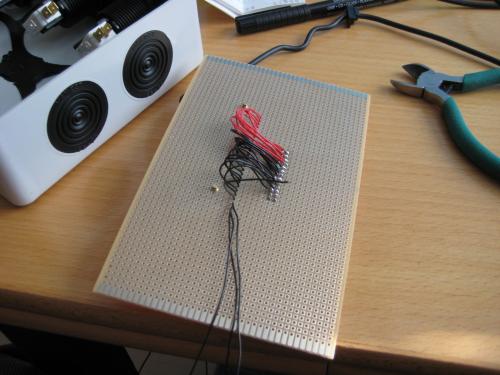
Fliped the whole lot over and soldered the wires into place.
Then I fastened the board to the bottom of the box with, again, a couple of screws.
It was a good fit.
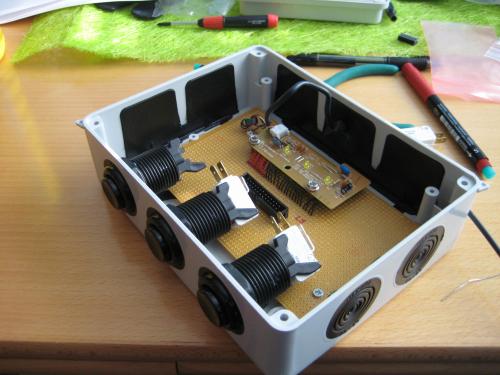
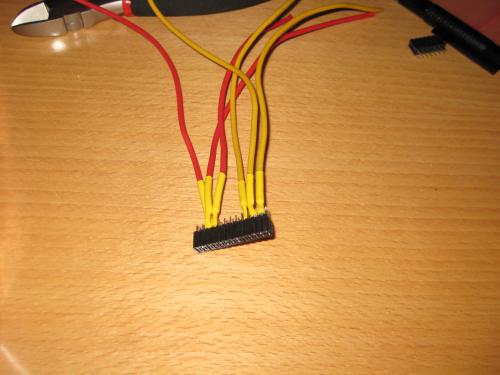
Started soldering the cable harnest that will connect the buttons to the encoder. Since I soldered cables to all connectors on the encoder I only have to add cables to the right pins on the harnest to add buttons later.
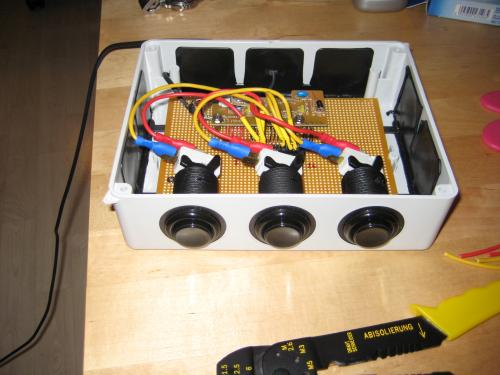
Final assembly.
I was fed up with soldering and used a crimping tool in the end. This also helps when buttons need to be removed/replaced for the final move to the arcade style housing.
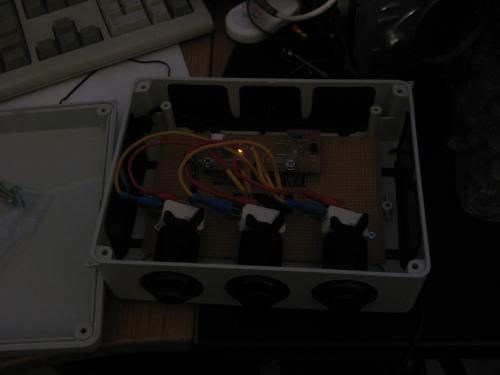
A quick test before declaring victory. LED's that light up is almost always a good sign.
Function buttons in external casing. -Done.
Taking controll over Mario...
Next on this build is to incorporate two original NES and two original SNES controllers. I've been planing this for a couple of weeks now. I'll use the same box as in the keyboad hack above for this part. I got a e-mail today saying that the parts I need are "in the mail", and they should hopefully arrive this week.
In the meentime I've started work on the box.
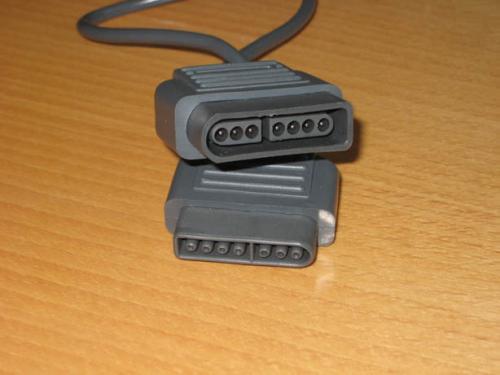
First I measured where to place the controller ports. I'l use the female parts of two extension cords to the SNES controllers.
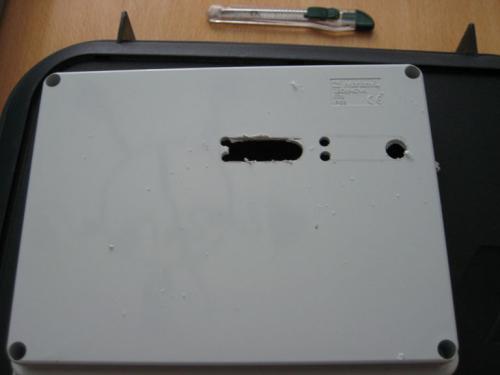
Next job is to cut the holes. I used two drills and my Dremel.
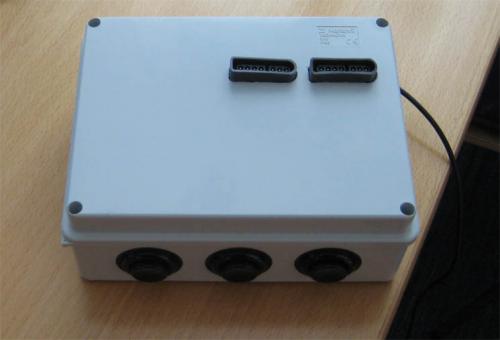
Finaly done and test fitted it looks like this. I'm gonna put the NES connectors to the left of the SNES sonnectors.
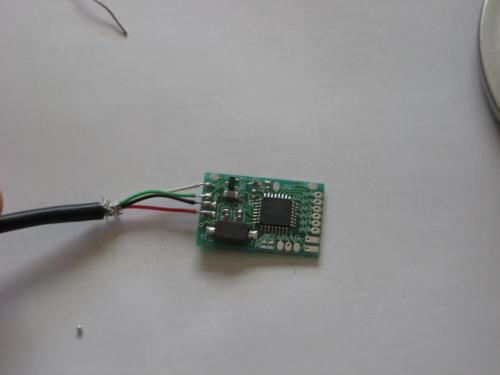
The 4NES4SNES21USB circuit has finaly arrived.
I've started by soldering a usb cable from and old webcam to it.
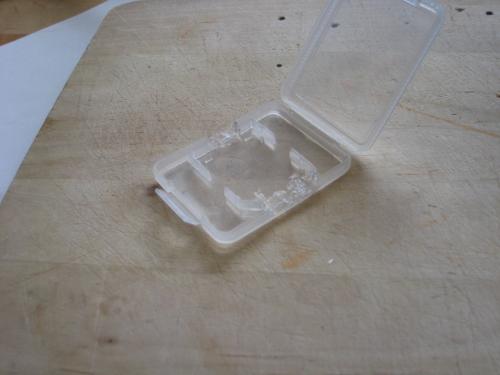
I got this plastic container with a SD card and now it will house and protect the circuit.
I melted the sides down for cable access.
I've soldered short cabels to the other connectors on the circuitboard and hot glued
over them to hold the circuit in place.
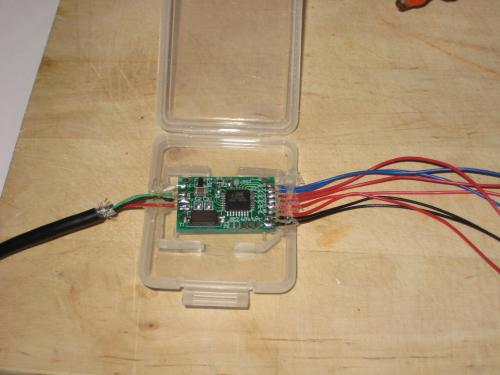
All tucked away in a safe place now.
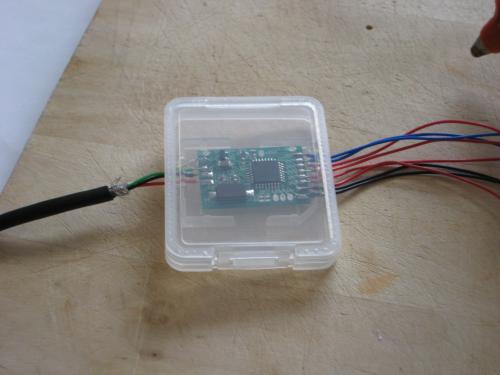
Glued the cabel and plastic container into place.
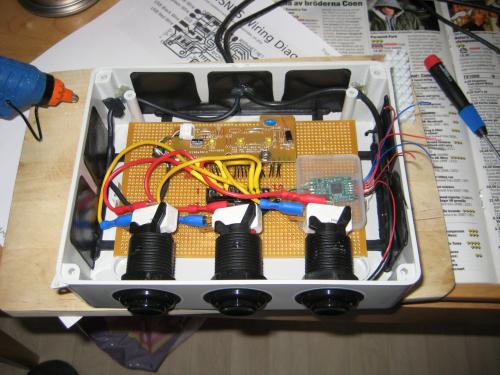
I connected the cables from the circuit board to the Euro-style terminal block on the left side to make it easier to replace or repair.
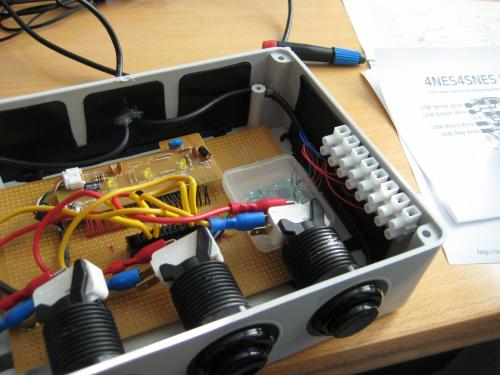
The final cables connected.
A quick test in in XP showed that they worked perfectly as individual controllers.
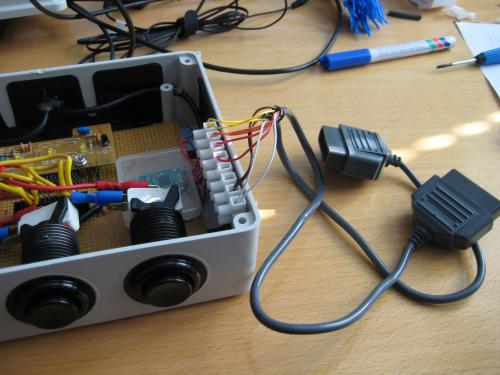
I've been trying to buy "broken" NES units from Tradera.com (Swedish, owned by Ebay.) but someone else always feel that they'd like to spend a lot of money on the broken crap I need. I'd like to find something for about 1kr - 25kr.
50kr at the most but then it has to be incuding shipping...
Today I finaly found a doner for the two NES controller ports I need. I bought a Nintendo Four Score from Tradera.com. I can't wait for it to arrive..!! :)
Also in the mail:
1.) 1 Led-Wiz (tm) 32-port USB Lighting and Output Controller.
2.) 22 Electic Ice (tm) Lightable Horizontal Pushbuttons.
3.) 22 RGB-Drive (tm) Pushbutton Lighting Modules.
To mark which black function button does what I got the idea to make some clear, plastic, washer overlays. I'll print out some nice images with the words Paus, Menu and, Service. Then pin the image under the washer using the lip of the button.. Confused?
The general idéa looks something like this..
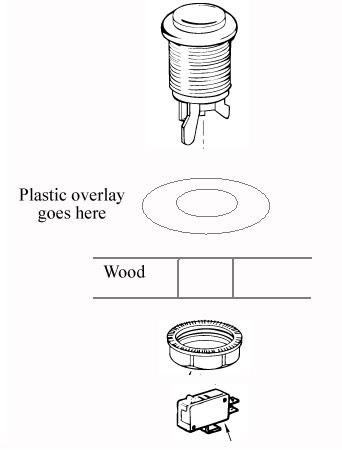
Stay with me and things might become clearer.
I used an old CD-cover and my trusted Dremel. First I started out by taking some measurements and cutting the CD-cover into four pieces. Then I marked, roughly, the middle of each piece and drilled a small hole there.
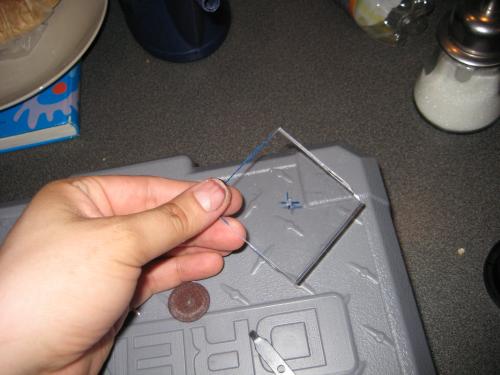
Then I cut the corners of to make the pieces slightly rounder. Using a marker I drew a circle with the aprox diameter. Sorry for the poor quality of the picture... It's to late to go back and take a new one.
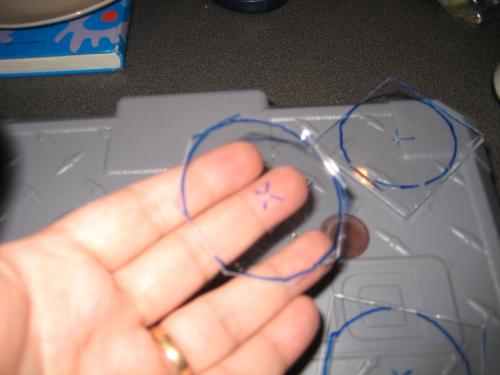
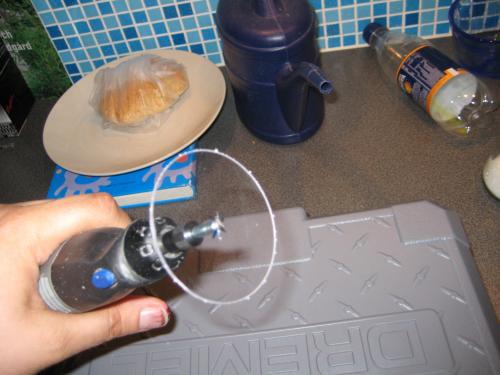
Finaly I attached the discs to the Dremel and grinded the discs to right size against a piece of sandpaper. All that is left to do is to drill and grind up a hole in the middle where the button will go.
Here I've test fitted one.. Do you see where I'm going with this now?
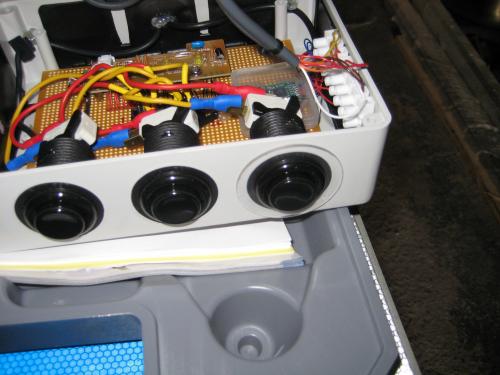
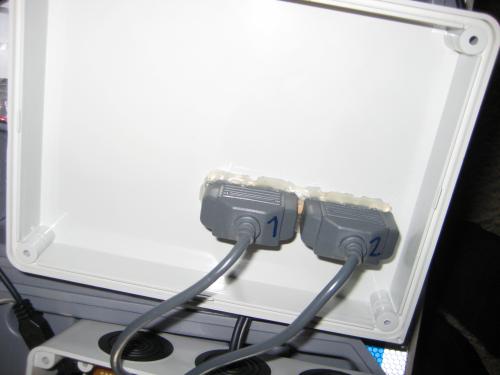
I took the time to hot glue the SNES ports into place. They're rock solid now.
The NES ports haven't arrived yet.
A realy simple design but it sure makes things more clear, right? I'm gonne sit down and do some real desinging when I get some time over. I'm gonna print something colorful on my photo printer. I'm thinking NES-red background and black lettering.
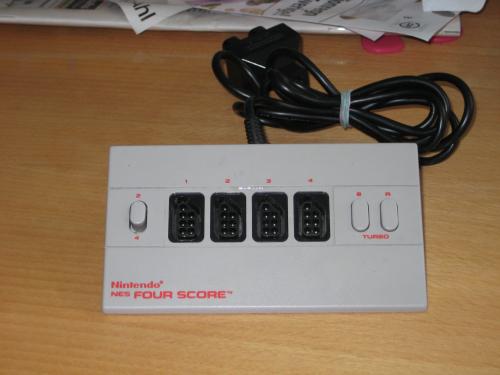
So the Four Score finaly arrived today. Let's see what we have inside it, shall we?
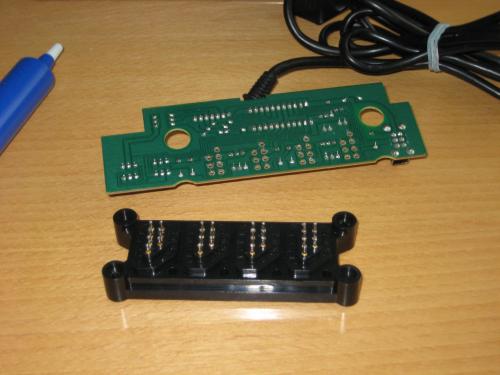
24 solder points later the ports are free.. I need to solder some wire to the pins.
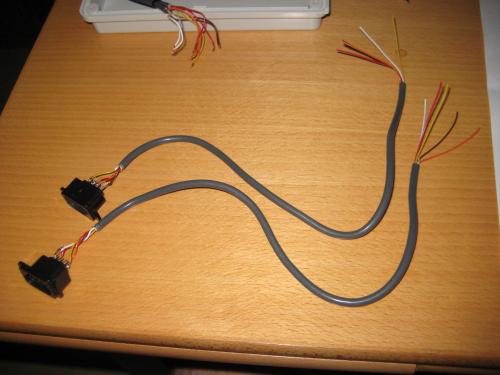
Soldering done. I used some of the cable left over from the SNES controllers.
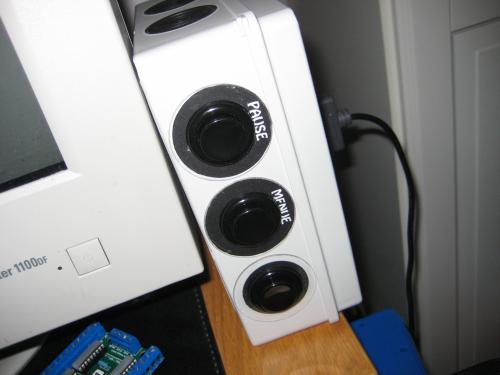
Here I've marked where I'll place the ports. I used my dremel to cut and grind.
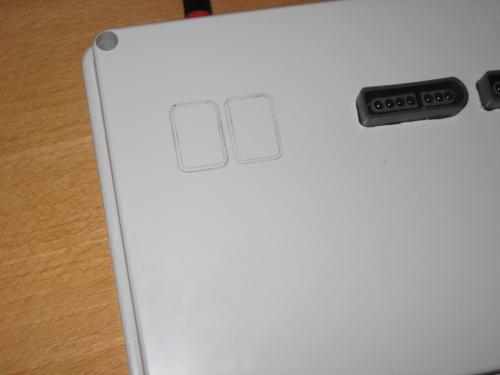
Posrts are glues into place.
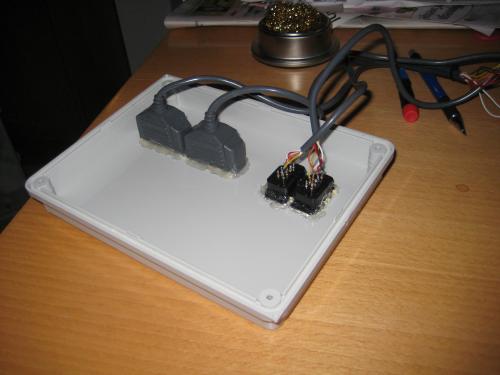
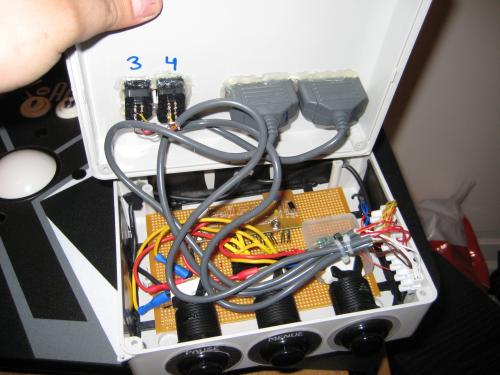
All wires connected. All that's left to do is to test it.
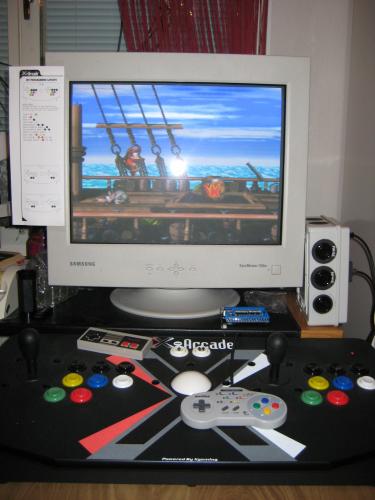
Donkey Kong Country on the SNES is one of my all time favourites.
I like the whole series of Donkey Kong's on the SNES.
I hade to replace my 8-bit Nintendo emulator since it didn't support dual controls (tankstick & origirnal controller at the same time). Fortunately I found VirtuaNES which does support it.
Today the Electric Ice buttons and the RGB LED drivers arrived from GroovyGameGear.com.
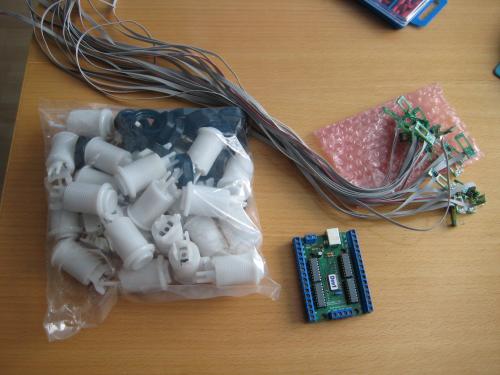
I got the Led-Wiz acouple of days ago now and FINALY I can start the button makeover.
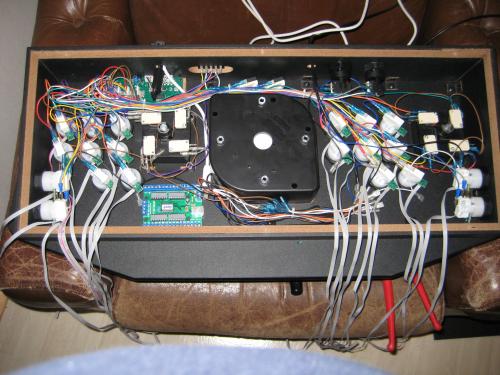
So I've opened the bottom of the tankstick again and have replaced all the pushbuttons and installed all the RGB-LED's. All the gray cables haning out at the bottom are from the LED's. I've also found a place for the Led-Wiz.. T
here wasn't that much space left in the Tankstick to begin with because of all the unnessesary cables X-Arcade left in it..
I hoped that I could have replaced the cables but I remembered wrong. I remembered that the circuit had terminals you could screw the cables on to, like the Led-Wiz has,
but this was not the case.
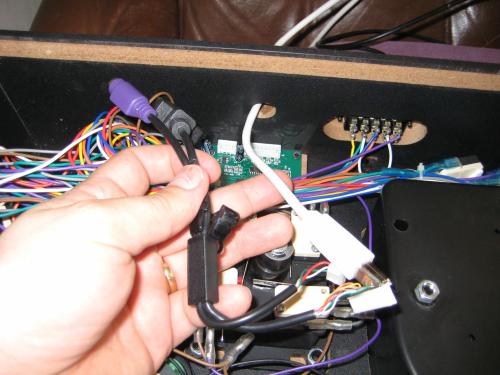
To be able to fit the USB cable to the Led-Wiz through the small hole on the back of the Tankstick I had to remove the existing I/O cables first.
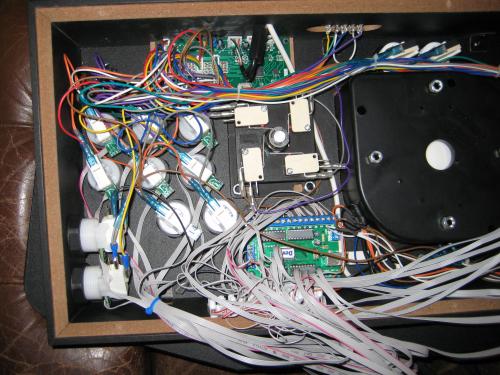
Everything is finaly connected. It looks like hell, I know... I know..
Let's see how long I can live with it, shall we?
Back in place... New shiny, white buttons.
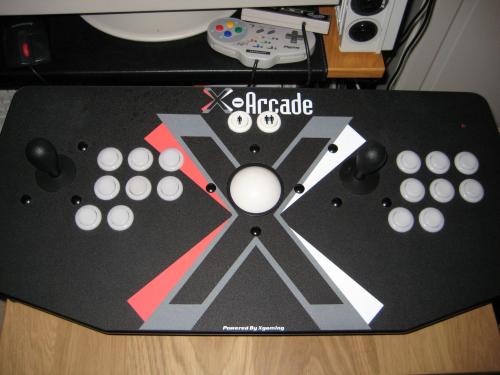
My camera skillz need improving but you get the picture, right?
Did you notice that the coindoor is visible on the left?
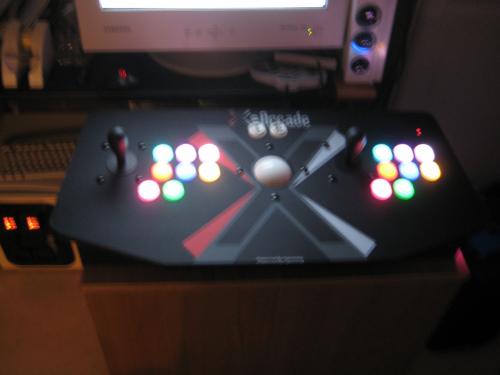
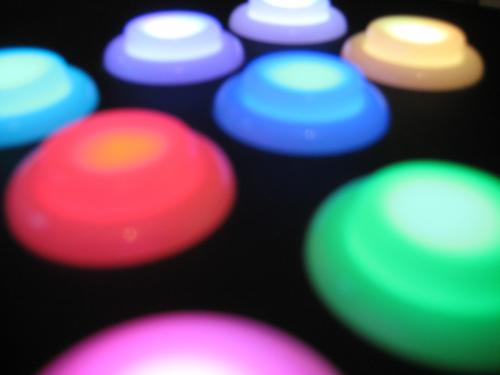
Close-up......... Sweeeeeet! ;D
MAME Roms - How to get them to work..
I've been cleaning up my MAME game library.... Not the most fun thing you can do.
You'll need to have RomCenter and ClrMamePro.
RomCenter shows which files you are missing in non-working roms. Use this informaion with Google and you'll soon have it sorted.
CrlMamePro helps you to rebuild your roms to the version of Mame you are running.
Current version of Mame is 0.132.
Both RomCenter and ClrMampro are hard to figure out but then easy to use when you've got how they work. There's some fairly good guides out there..
Again, try googeling and you shall find what you seek.
Finaly.. The build is about to begin.
25 June, 2009.
Take-off, for arcade construction, granted.
Holy shit. I don't even know where to begin! I've realy got to start planing and figuring things out now. Keep calm.... Waaaaaah!
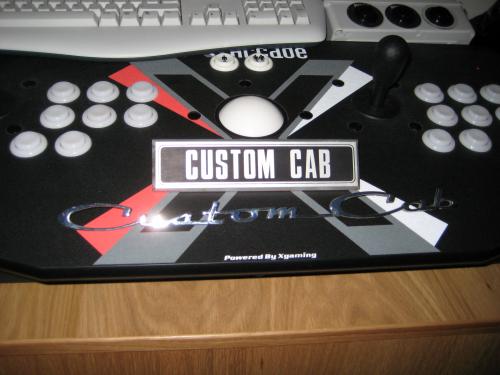
I found these realy cool signs at a local market last weekend. Two diffrent "Custom Cab" signs. I'm gonna remake the marquee and let these signs inspire the theme of this cabinet.
Hiding windows: Damn those standard cursors!
I posted the solution below at MaximusArcade fourm July 11 2009. -Edited Sept 08 2009.
----------------------------------------------------------------------------------------------------------
Ok here's how you hide the cursor completely at startup of Windows XP... Remember who gave you this solution. 
***************************************************************************
If you'd like to change the cursor in your control panel to let's say, a dinosaur. You'll still have the standard white arrow cursor displayed for about one second when you startup and shutdown Windows. This is because the standard cursor is shown before (and after) the user defined cursors are loaded. So to hide the cursor we need to replace the standard cursors....
The standard cursors are stored in the User32.dll file.
And to make things worse the user32.dll is backed up in dllcache.
We'll backup then edit the user32.dll and replace it in it's original place and in the dllcache.
You'll need the following..
1.) A blank cursor, or the smallest one you can live with showing at bootup and shutdown.
2.) A Windows XP install CD.
3.) ResHack program get it here ----> http://www.angusj.com/resourcehacker/
4.) Administrator password to the PC (if any).
In this example I'll call the cursor for blank.cur.
Put you blank.cur in the cursors folder in your windows directory. (c:/windows/cursors)
Just so you know where you have it.
Download and extract Reshack to any folder. Run the "ResHacker.exe" from that folder.
Click on "File" and then "Open". Browse to the user32.dll file (c:\windows\system32\user32.dll) and open it.
Expand the cursor folder, here you'll find all standard cursors neatly setup in their own folders. Find the cursors you'd like to change. I chose to replace the "arrow" and the "arrow and hourglas". Rightclick on the flower-icon for the cursor you'd like to replace and choose "replace resource". Replace it with the blank.cur that we placed in c:\windows\cursors.
Repeat with any other cursors you'd like to replace.
The next IMPORTANT step is to select "SAVE AS"!!! not "save"!!
Save it as user32new.dll in the c:\windows\system32 folder.
Next step is to replace the user32.dll file(s).
Insert the WinXP CD-ROM into the CD-ROM or DVD-ROM drive and then restart the computer. Select any options that are required to start the computer from the CD-ROM or DVD-ROM drive if you are prompted to do so.
When the “Welcome to Setup” screen appears, press R to start Recovery Console.
Here you might be asked to enter the admin password.
At the command prompt, type the following command, and then press ENTER:
cd windows\system32
To rename the User32.dll file, type the following command, and then press ENTER:
ren user32.dll user32.bak
Then rename the User32new.ddl to user32.dll by typing the following command, and the press ENTER:
ren user32new.dll user32.dll
The final step is to replace the backup windows stores in the dllcache folder.
copy your user32.dll to the dllcache folder by typing the following command,
and then press ENTER:
copy user32.dll c:\windows\system32\dllcache\
Press "Y" to overwrite the file and your done.
Take out the Windows XP cd and type exit in the prompt to exit the Recovery Consloe and restart your PC.
Now the arrow cursor at startup will be replaced with your blank.cur.
Note that when Windows has started the cursor that's set in cursors in your control panel WILL be shown.
ENJOY!
----------------------------------------------------------------------------------------------------------
2009-08-04 I'm back! I've had some computer issues but they have now been sorted.
New parts for the Control panel have been ordered and sent from GroovyGameGear.Com. -More info later!
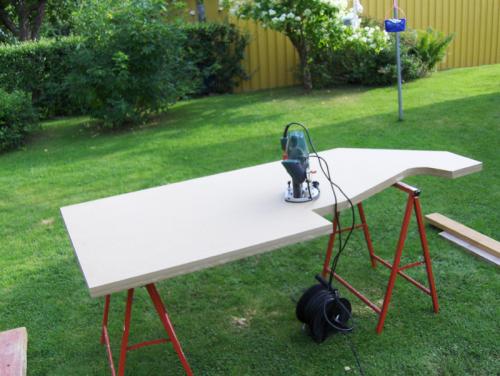
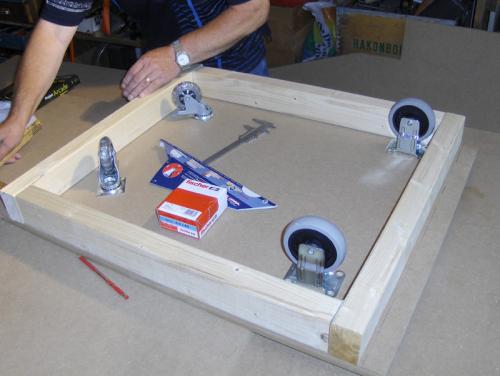
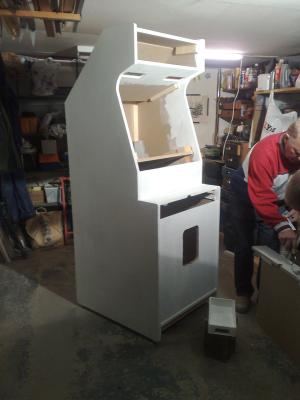
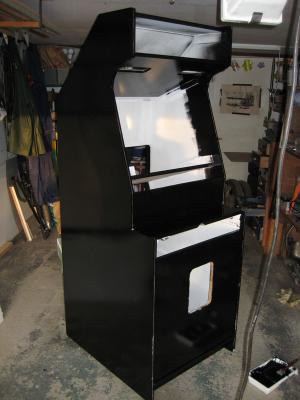
2009-09-08 So I have been building the cabinet for a while now.
Sorry 'bout not posting any pictures here.. I've been posting about the build at BYOAC.
Have a look here --> Kmans Summer build. I'll post some pics here later...
2009-10-29 Heres some pictures for you.. :)
Stay tuned for more...
-Peter
a.k.a. Kman (Maximusarcade forum)
a.k.a. Kman-Sweden (Arcadecontrols fourm)

